Showing posts with label projects. Show all posts

Friday, May 21, 2010

The Great Bathroom RENO #5

Ok you know you are a slacker-blogger when you actually have to go back and read your last blog to see where you have left off! To look at the pictures I posted last time makes me feel awesome because we have really come a LONG way since then.
So the first thing we had to do after we got the shower base in was to prepare for the walls. We had had a lot of trouble trying to get the ancient shower knobs off, so we kept putting it off. Well, here it was...we HAD to get them off to install the new walls, no way around it! It was quite a process, Jonathan tried as hard as he could to get it off with no avail. I suggested we take a break and just come back to it. At this point it was sort of a pickle-jar situation. You know, you try and try to get the lid off and it won't budge, then someone else picks it up and it appears to be the easiest thing ever? Well, that happened but it was still him trying. It was like he barely touched the knob with the wrench and it basically flew off. Whew...glad that worked :)
So generally, you are supposed to install the back wall first, but we couldn't because we were not interested in re-working the entire piping line for the shower, and with the curve of the walls we chose there was just no other option but to install the side wall first. This called for hours upon hours a bit of time measuring and cutting the holes for the fixtures. Perfect fit!
So then it was time to attach the walls. We pre-drilled holes for the nails, and got the caulk gun ready with the Liquid nails. About half-way through the application of liquid nails, I came to the realization we were absolutely NOT going to have enough. I wiped down the spots I had already covered and announced we would need to return to HD for more. * lesson learned: always get way more than you think you need or than the directions say...you can always return it if you don't use it, but most likely you will have gotten the perfect amount anyway!
So once we got back and I applied the adhesive, there was no time for thinking, we just had to stick those walls right up and then nail them in! It was all over pretty fast. We pressed them in firmly haha, and then rigged a couple of shower curtain rods between them to hold them in place while the adhesive set overnight...the directions suggested constructing a brace of 2x4's. Crazy direction-writers.
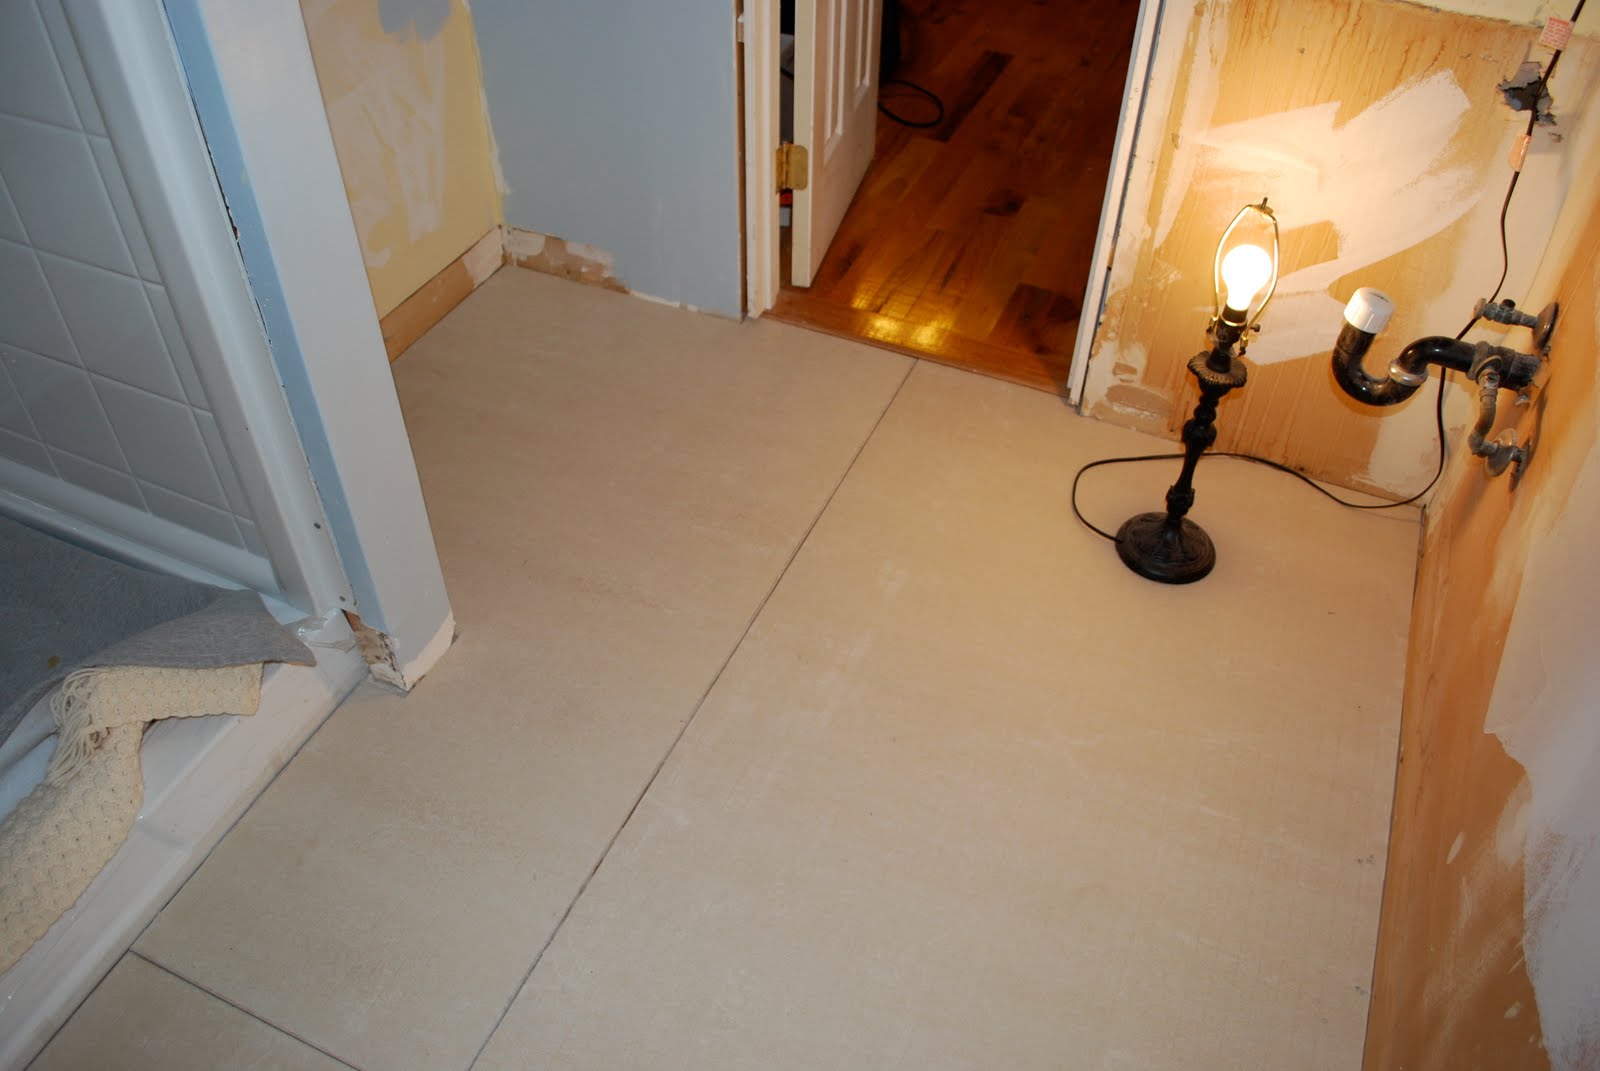
Alrighty...shower, check! Now its time to move on to the floor. First, we needed to install the cement board as a backing to the tile. We chose hardie backer board. After some strategic measurements, we figured out how to use only 3 pieces (meaning only 2 seams!) to cover the floor. Cutting the pieces of board was pretty tough, it is cement after all. Apparently the dust that cutting the board makes is toxic silica dust. If we keel over dead any time soon, rest assured that it was due to the inhalation of that stuff! Notice "smoke" in 1st picture, amazing cut in 2nd picture, and final product in 3rd
So the boards are cut, now its time to mix up the mortar...eek. *lesson learned: this is one beater you DO NOT want to lick afterwards-ha. It was tricky to figure out how to spread it evenly, but  guess it was good practice for the tile. You'll see a picture of our "trial palette" using leftovers we found in the crawl space from some tile project long ago, and you'll also see our disposal method :) we weren't familiar enough with the consistency we were looking for so we decided to mix up the entire bag according to the directions and see what we got. I'll mention here that once the stuff was mixed, I could barely pick it up, much less haul it upstairs...go Jonathan!

Now its time to cut the tile! We decided to measure, cut, and lay out all the tile so we made sure to get it all right before setting it in the mortar. This ended up taking an entire day. We borrowed a wet saw, and made a HUGE MESS of our garage after all was said and done. Props to Jonathan for his stellar cutting, and me for my stellar measurements. We only messed up one piece, but were still able to use it so no one will ever know...wait...until now.

And then came the true test...the moment we've all been dreading...the laying of the tile. After 3 days of after-work prep, we had everything labeled, organized, and ready to go. Last night we got started about 6:15 with the first batch of mortar and the first row of tile. I'm not going to lie, that was probably the worst thing we've done so far...we are talking way worse than joint compound, people. We persevered, and within no time we had a real system going. Jonathan mixed up the cement downstairs and brought it to me. I would spread it for the next row, then Jonathan would lay the tile, add the spacers and press it in place. Then, I would clean out the spaces, even everything up, and re-position the spacers while Jonathan mixed the next batch. And so it worked for all 6 rows! We finished up at 9:15 after spending a while scrubbing cement off of the surrounding floor and ourselves...not bad for our first try! I will say that the tile looks much better in person. I don't know what it is, but it really does not photograph well so you will just have to come over to see it when it's done!
One more thing. The FUNNIEST thing ever happened when we realized that we had not shut the window of the bathroom. As I'm sure you know, after you install tile, you are not supposed to walk on it for 24 hours, but it was supposed to rain today so we could not leave it open.  The dilemma. So Jonathan uses his Stretch-Armstrong abilities (I'm not sure either of us knew he possessed these) to step from the doorway and into the shower with only a small boost from me underneath his foot( note: I desperately wanted to get a picture of this occurring but that would have been cruel). He successfully closed the window but then realized it was going to be infinitely harder to get back to the room. I can't even explain what happened next... there are no words. I swear I think he somehow flew back into the room. It was hilarious, no doubt.
The End (for now)


Sunday, April 18, 2010

The Great Bathroom RENO #4

I have some real updates to make on this post. As I mentioned before, Jonathan and I both took a couple of vacation days during "Spring Break" to work on the bathroom. It was so awesome to not have to work!!! Don't get me wrong, I love my job, but it was great to catch up and get some progress on the bathroom. Now, I have a ton to talk about so I'll stop my rambling and get started.
 To start off, it was time to tackle the crown molding. After one piece of scrap completely sawed into pieces on Tuesday night, we decided it was time for a new approach. After a little more googling/youtube research under our belts, we figured it out on the FIRST TRY on Wednesday..go team Rhoades :)

 If you have never done crown molding, then you don't realize what an accomplishment this is...if you have, then thanks for the applause you are no doubt giving us right now!
 I'm just going to point out that Wednesday was not only the day we successfully conquered the molding, but it was also our 3 year anniversary! Below is our 3rd year picture.

 So we haven't opened the window since we painted the 7 million coats of kilz/paint on it, but it was getting stuffy in there so while Jonathan was fighting with the shower subfloor, I was working on the window. Ta-da! Both complete below.

 I have to say the crown molding looks pretty spectacular, too. I am not trying to sound arrogant at all...I was genuinely suprised/impressed by our hard work. It took us most of a day to finish the measuring/cutting/nailing/spackling/caulking/painting...but I think it paid off!

 Whew! After we finished that, we came to a point of no return in our project. Well, you might say we've already come to that point long ago, but to us the installation of the shower has been sort of hanging for some time. We wanted to get everything above the shower completed first to limit the abuse to the shower base for the rest of the remodel. At this point there was no way to stall any further (get it...stall??? haha I crack myself up). We made our largest purchase so far in the project. In fact, I added up all we had spent so far and shower was literally half the total cost of the porject up till now! Here is how we got it home :)

 It is a base/walls set...I can't remember right now what it is made of...something plastic I guess!
 Basically what we did after this was quite a process. We had to take more sheetrock out (oh, boy!) and then have the greatest plumbing adventure ever. I'll leave you with a couple of pictures of that process. Right now, we have the plumbing re-figured and the base and showerhead installed. Next come the walls, and I'm not sure when we will have time to get to those!


Friday, February 26, 2010

The Great Bathroom RENO #3

So last week I told you about the stud where the closet used to be that hung down about an inch. Jonathan came up with a really great solution to that problem! We were planning on putting beadboard on the ceiling anyway, so he suggested we just get some boards and nail them up to the existing studs to “drop” the ceiling about an inch…clever, clever! So we spent for-ev-er at home depot picking out what could have been every 2x3 they had that was even remotely straight. We searched for the studs for a while, eventually found and marked them, and then placed the “false studs” up.
 
Then we were ready for the beadboard. We borrowed a friend’s air compressor and nail gun…and that’s where the fun began! This was a GIANT air compressor. We couldn’t even hope to get it out of the back of the jeep, much less up the garage stairs and then up the stairs in our house…so we just left it in the jeep, albeit unconventional… it seemed to work fine. My bright idea was to run the hose up through the window – genius! Tying off the hose with the cord from the blinds…Jonathan’s idea (I was not a fan of this idea, but I guess it worked ok). As you can see, we were very successful with the beadboard ceiling. I think it looks great! And look at that wall we had to surround…that took brains, people!
  
And now to catch you up on the current status of the project…we have added 2 more coats of joint compound to the new sheetrock and corner(waiting 24 hours and then sanding in between each coat), and we have putty-ed and primed the beadboard ceiling. Jonathan is painting the ceiling today with a  white semi-gloss. Last night, we went by Home depot to pick up a sample of the wall color we chose…you’ll just have to wait and see what it is! Any guesses??? The next step is installing the shower. We have one picked out, but we are still making the preparations for it…we have to move the drain! I’ll keep you updated on everything in current status from now on since I have caught you up to present time! So…what do you think so far? I’m interested to know who is even reading this, so go ahead and comment!

Friday, February 19, 2010

The Great Bathroom RENO #2


Ok…so the next step was to take out the closet framing. It is still debated who actually came up with the idea, but again….my blog ;) “We” thought it would open up the room a little more, and it also wouldn’t be as crowded in the doorway. 

So all we needed to do was just take out the sheetrock around the doorway and the pry off the studs that framed out what used to be the closet door. Easy enough, right? Yeah right, nothing is that simple! Getting the sheetrock down was great fun, and is really a great way to get out any pent-up frustration you might have!
          
Then came the studs …until we got to the very top 2x4 on the ceiling. It was attached to studs on both sides, and hung down about 1 inch from being flush with the ceiling. Ever-positive me just said, “oh, its fine, we’ll just paint it white…it’s the ceiling, no one will ever notice ” Jonathan did not agree. He wasn’t very happy about it and so he starting brainstorming a “plan.” More on that later.

We knew we would need to replace 2 small sections of sheetrock where the closet had been attached to the wall, so we made way to many trips to home depot and back to figure out exactly what we needed, and then I started to measure/cut. 

The sheetrock is where I really began to shine…my crafting abilities kicked in at that point. Jonathan stood in awe as I cut ever-straight lines of sheetrock! We measured/cut/measured/cut for the next little while, and then screwed in the semi perfectly cut pieces. 


AND THEN CAME THE JOINT COMPOUND. 

Maybe the lowest point of the bathroom project so far…when I had to kick Jonathan out and do it myself. Again, I have instinctual crafting abilities and am generally laid back, so I was great for spreading and evening out the compound, where as it frustrated the tar out of J. 

My finished product doesn’t look to impressive in the picture, but believe me it was truly a work of art (especially after I waited 24 hours for it to dry and then sanded out the imperfections! wink, wink.)

And that, friends, completes our first “constructive” step of the project!

Sunday, February 7, 2010

The Great Bathroom RENO

BACK STORY: Jonathan and I officially bought our house on April 15, 2008. Since that day, we have planned on eventually renovating our master bathroom. The bathroom still has the original fixings from the mid-seventies, including cracked tile and a very dirty cabinet and shower. Needless to say, I have not been interested in using it until we renovated.  We have talked through it several times, and have even had someone come out to give us an estimate (eek!) but did not officially start the project until 3 weeks ago. 

We "disagree" about what was the final push that sent us over the edge of getting started, but my reasoning is better this is my blog so you get my version:
Since the great Atlanta flood of the fall of ’09, we have had one water problem after another. We have come up with solutions to most of them, including cleaning out the main sewer line (may blog about this at another time), getting the roof patched, playing in the crawl space,  and re-caulking the tub. After all this…renovating the bathroom ourselves is a piece of cake…right? RIGHT?? Well at least they gave us some confidence **life lesson#1 - gain confidence in the little things!


And so it begins…

Saturday, January 23, 2010. The 22nd annual Polar Bear Run at JFBC (our church). We had volunteered to help out with registration that morning, and so we were up at the convenient time of 4:45am. By 9:30 we were done. We stopped by McDonald’s Home Depot and grabbed a couple of sausage biscuits crowbars and headed home to get started!

I guess I don’t know how many details you people want, but by the end of the day we had successfully:

-tried to turn off the water
-got frustrated at how hard it was to turn off the water
-finally turned off the water
-wondered if we should continue this insane venture
-unhooked the sink

-tore out the counter top and cabinet

-chipped away the floor tile

-emptied and removed the toilet

-removed 2 inches of concrete off of the subfloor

-began breaking the shower tiles (WAY harder than the floor... Jonathan had words with the tile on the shower)
-carried multiple containers of tile/concrete downstairs to the garage
-went out to dinner and wondered what we had gotten into
-watched a movie

WHEW! I know….we pretty much rock. I know you are all enthralled at this point, but you will have to wait for the next post to see any further destruction progress.

Stay tuned!